Stage 1 was how we bought the apartment
Stage 2 is what we're living with right now
Stage 3 will be when it's all done and looking gorgeous (hopefully by mid-2011)
Floor Plan
We've definitely chosen lifestyle and location over space!

What we've done so far
Our place was pretty grotty when we bought it. Nothing worked or had been replaced in about 30 years, so Stage 2 was all about cleaning it up and making it livable while we worked out how we wanted to renovate (and saved up!). We still haven't 'decorated' as such (i.e. using paint, wallpaper etc), as we always knew there were big changes on the drawing board. In the meantime, we've just tried to make it as 'fresh', functional and appealing as we could.
In Stage 2 we:
- ripped out the gross old carpet and laid engineered floating floorboards and pine skirting boards
- replaced the old metal venetian blinds with thick white 'eco shutter' blinds
- installed original art-deco glass light fittings
- replaced the mottled glass in the door that opens to the balcony with clear glass and a doggy door for the Monster, and painted the balcony floor white
- installed a custom-built polyurethane built-in wardrobe to the main bedroom
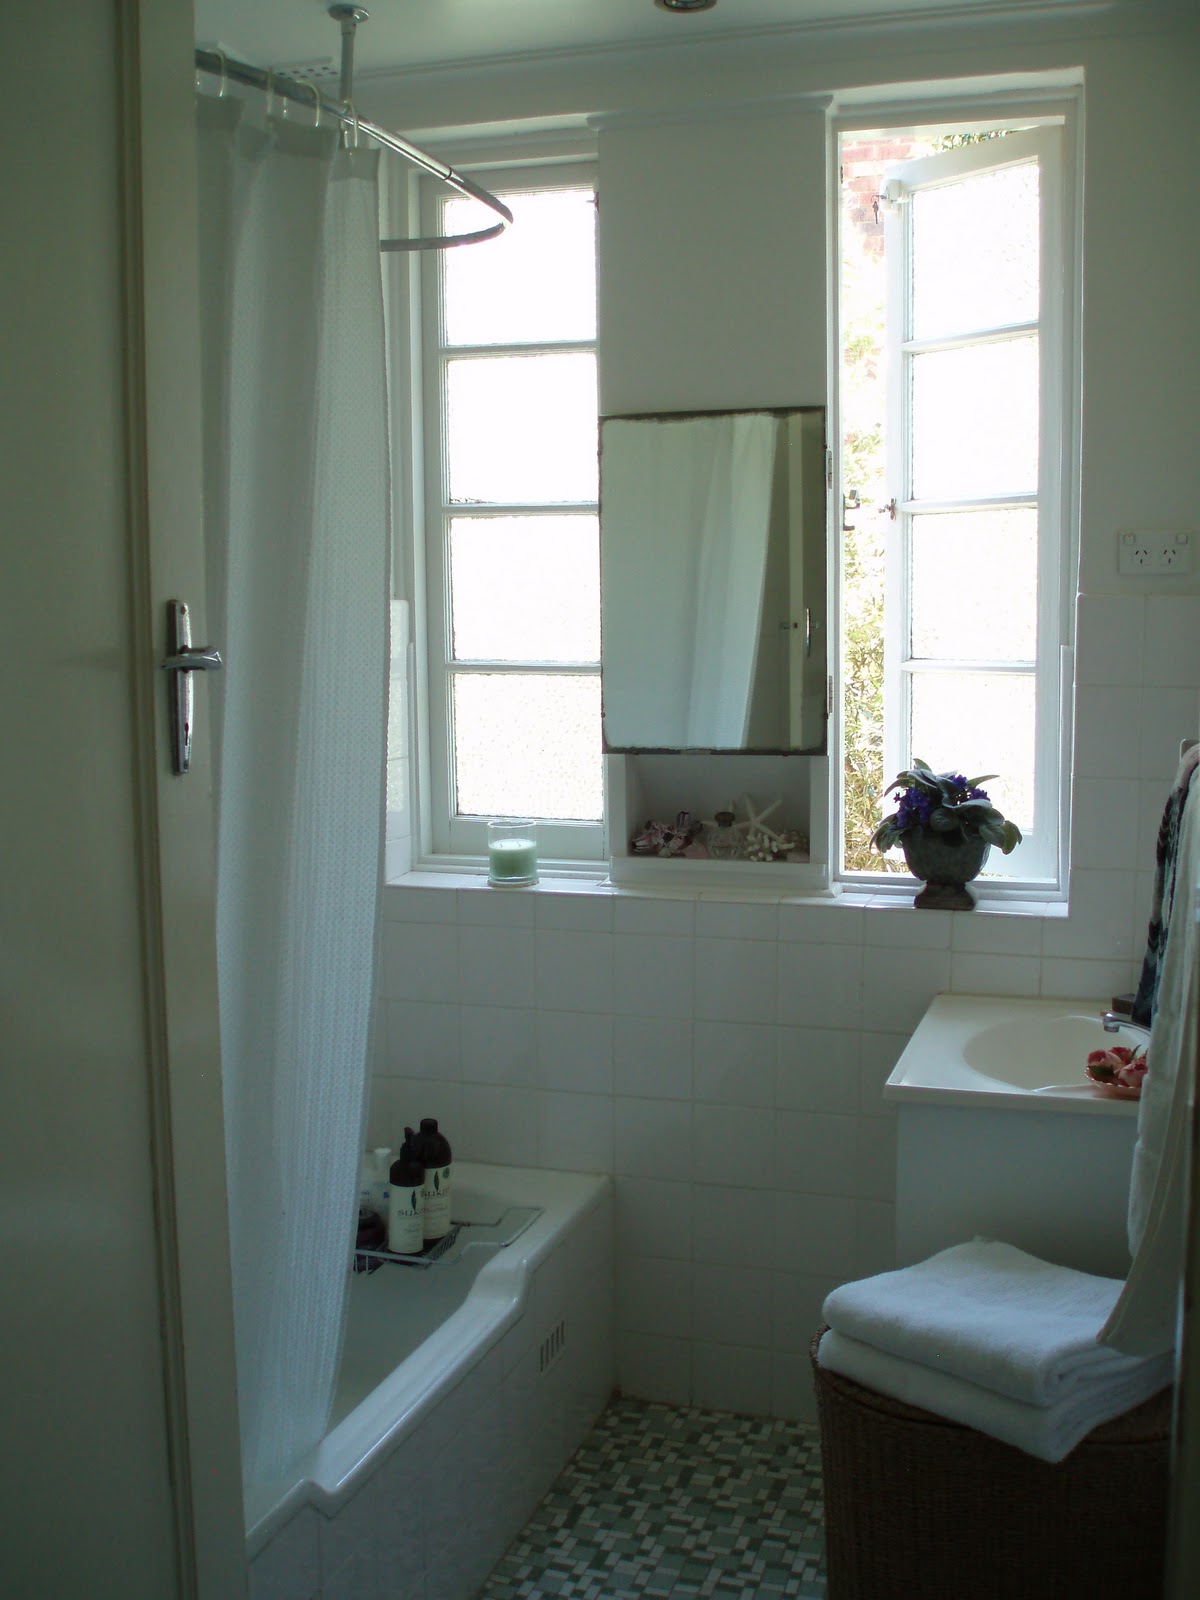
- repainted the bathroom, and installed a fan and a traditional ceiling-mounted shower curtain rod
- installed locks to all windows
- removed the door into the kitchen/diner and the doorframe (with no door) that led into the bathroom/main bedroom area
- replaced the non-working freestanding oven/cook-top with a new stainless steel model
- re-wired all lights/data/electrical, including removing all surface-mounted cabling.
What we're planning to do
In Stage 3, we're planning to:
- remove the wall between the eat-in kitchen and the living room
- remove the door and windows leading from the living room to the balcony, and replace them with wall-to-wall timber-framed glass bifold doors
- render and paint the balcony, and tile or deck the balcony floor
- replace the existing door handles, which are currently a variety of styles, with new chrome art-deco style handles
- install a new polyurethane kitchen with ceasarstone benchtops (including a pantry, under-bench washing machine and dishwasher - none of which we have now!)
- knock out the fireplace (it doesn't work and can't be replaced) to increase our wall-space
- re-paint the entire apartment using a coordinated colour scheme of antique white, charcoal and light grey
- re-decorate - the fun bit!
Our Building
1920's art deco double-brick walk-up - 3 levels, 12 units

Shared Backyard
Nice spot for a BBQ

Building Entry

Apartment Entry Alcove - Stage 1

Apartment Entry Alcove - Stage 2

Living Room (facing balcony) - Stage 1

Living Room (facing balcony) - Stage 2

Living room (facing entry) - Stage 1

Living room (facing entry) - Stage 2

The wall behind the furthest couch will be removed in Stage 3 to create one big open-plan lounge/dining space.
Fireplace - Stages 1 & 2

This fireplace will be removed in Stage 3 (it doesn't work and can't be replaced) to create more wall space. This will allow us to swap our lounge to go the full length of this wall, and put the TV cabinet on the other side of the room.
Kitchen (facing cabinets) - Stage 1

Kitchen (facing cabinets) - Stage 2

Kitchen (facing entry alcove) - Stage 1

Kitchen (facing entry alcove) - Stage 2

Bathroom Stage 1

Bathroom Stage 2
It's quite pretty in here now - we might not do a whole reno on it, maybe just replace the vanity with a nicer one that's in keeping with the old-world vibe
Main bedroom (bed) - Stage 1

Main bedroom (bed) - Stage 2

I'm planning to paint the walls in this room a soft grey, with the window frames and trimmings antique white.
Main bedroom (corner window) - Stage 1

Main bedroom (corner window) - Stage 2

Wardrobe (well, no wardrobe) - Stage 1

Wardrobe - Stage 2

Guest room Stage 1

Guest room Stage 2

Guest bedroom Stage 2

We're going to put in another built-in wardrobe along this entire wall, replacing where the bookcase and freestanding antique wardrobe that are currently standing side-to-side. Yay for the extra clothing storage, boo for nowhere to put all those books...
Balcony Stage 1

In Stage 3 we're tiling or decking the floor, and rendering and painting the bricks an antique white. I'm also lusting after a full-length outdoor lounge to lie on, and to use to extend the living room once the bifolds are installed (see next pic)

This 'wall' is going in Stage 3, to be replaced by timber bifold doors (the timber portions will be painted white to match the render)
Balcony Stage 2


For a temporary outdoor setting, I bought this rams head table (see the leg tops) from Bondi Beach markets and spray-painted some Ikea cane chairs antique white.

The End
That's it so far! Big changes are planned in the next few months, and I'll keep this thing updated as they happen - watch this space!